Flight International discovers the capabilities and limitations of the B-1B Lancer bomber

Mike Gerzanics/MCCONNELL AFB

No other programme better symbolised the 1980s Reagan-era US defence build-up than the Rockwell (now Boeing) B-1B Lancer. Despite problems that plagued its initial development, the aircraft eventually matured into a capable strategic nuclear bomber. But the breakup of the Soviet Union brought into question the B-1's viability. The 1991 Gulf war served further to marginalise the aircraft: reliability issues forced theB-1 into the background while B-52s bombed Iraq. Lancers finally came to the forefront in 1999 when they dropped tons of unguided Mk82s on area targets in Kosovo.

While successful, the Kosovo operations highlighted several major limitations of the B-1. Lacking a precision-munition delivery capability, the aircraft was relegated to striking area targets. Even then, only as a part of a total force package, including fighter and electronic warfare assets, could mission accomplishment and crew survival be assured. A number of upgrade programmes, however, have been undertaken to address these deficiencies.

Flight International flew a B-1 operational training sortie with the Kansas Air National Guard's 184th Bomb Wing to sample its capabilities first hand.

Flying Jayhawks

Of the US Air Force's 90 operational Lancers, 17 are assigned to the Air National Guard, split between units in Georgia and Kansas. Previously an F-16 fighter unit, the 184th Bomb Wing at McConnell AFB in Wichita became the first Guard unit to move to the B-1 and was declared operationally ready in 1996.

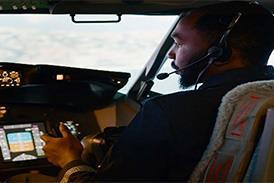
The day before my flight, I spent an hour in a full motion simulator familiarising myself with the pilot's position. Having over 500h in the General Dynamics F-111, I instantly felt at home in the B-1's cockpit. The side-by-side seating and analogue-tape primary flight instruments were quite similar to the F-111's. One notable difference was the B-1's vertical situation display (VSD). The VSD is a large cathode-ray tube attitude direction indicator (ADI). Unlike the F-111, which had a dedicated terrain-following radar (TFR) display, the B-1's TFR information is displayed on the lower third of the VSD - a neat arrangement.

One unique feature of the B-1 is its fuel centre of gravity management system (FCGMS). This measures fuel quantities and computes actual centre of gravity (CG) which it then compares to the target CG for that flight condition. If they do not match, the system transfers fuel between forward and aft fuselage tanks - those having the greatest moment arms - to correct the problem. While some commercial aircraft actively manage CG through fuel transfer, the B-1's variable-geometry wing compounds the task. Wing position is an input to the FCGMS, but not a limiting factor.

The pilot can select a wing sweep that, based on current fuel distribution, will result in an out-of-CG condition. While the FCGMS will immediately try to correct the imbalance, it may not be fast enough. One B-1 was lost during testing due to just this factor. The FCGMS display, located on the forward instrument panel, shows the allowable CG range for the current conditions, as well as actual and computed target CGs. This graphical depiction should help prevent crews from placing the aircraft in an out- of-CG condition.

Kansas Lancer

My orientation flight profile was quite extensive, and incorporated a wide range of events. After take-off we would join with a Boeing KC-135R tanker to practice air-to-air refuelling, after which we would drop into the Smoky Hill bombing range for practice bomb runs. Once we completed the range work, we would proceed to the La Junta strategic training range at medium altitude. After one pass over La Junta, we would descend to low level where we would practise automatic and manual terrain following. After the low-level work, we would return to McConnell to sample the B-1's flying qualities in the landing pattern.

Accompanying me on the flight was Lt Col Richard "Tank" Tindal, instructor pilot and commander of the 184th Operational Support Squadron. We were also joined by Maj Brian "Doc" Dravis, offensive system operator (OSO), and Lt Kurt Tongren, a qualified B-1 co-pilot who would act as a safety observer from the defensive system operator (DSO) position.

After a pre-flight briefing we donned our ejection seat harnesses and proceeded to the jet. Our aircraft's nose art proudly stated it was "The Kansas Lancer". As neither of the two auxiliary power units (APUs) were running, the flight line was quiet as I accompanied Tindal on the walkaround.

Of particular note were the inlets for the four F101-102 afterburning turbofan engines. To increase the aircraft's "stealthiness", each inlet has prominent inlet guide vanes designed to prevent radar energy reaching the engine's fan face, a major source of radar reflections. The intermediate and aft weapons bay doors were open for our inspection, while the forward bay was closed as it contained an optional fuel tank. The walkaround was straightforward and completed in less than 5min.

Access to the crew compartment is via a motorised ladder just aft of the nose gear. Once on board I made my way to the pilot's position and strapped into the zero/zero-capable ACES II ejection seat. The cockpit is quite roomy, with a wide centre console separating the pilot and co-pilot positions.

The view from the cockpit was similar to that in the F-111: better than an airliner's but not as good as most fighters'. A small central overhead panel contains switches for the electrical and hydraulic systems. Both APUs were fired up in preparation for engine start. The engines were started two at a time, one per nacelle. All four exhaust gas temperatures peaked well below the 950¼C (1,700¼F) maximum. After engine start, Dravis started the full alignment of the two inertial navigation systems.

With INSs aligned and ground checks complete, Tindal called for taxi clearance. A slight advance of the throttles was all that was required to get the aircraft moving. As in a fighter, theB-1's nosewheel steering is controlled solely by rudder pedals. I found it to be quite responsive, allowing me easily to track taxiway centrelines as we taxied for take-off. Rudder pedal-mounted toe brakes were smooth and linear, allowing me to keep our speed below 20kt (37km/h).

With 7.5t of internal fuel, the aircraft's take-off weight was 163t, about 45.5t less than maximum. Wing sweep was set to 15° and the flaps and slats to full down in preparation for take-off.

Once we were aligned for take-off on runway 01R, I held the toe brakes and advanced the throttles to military power. After a moment, to allow the engines to stabilise, I selected minimum afterburner. With all four engines in re-heat, as confirmed by exhaust nozzles swinging open, I released the brakes and advanced the throttles to maximum afterburner.

Acceleration was brisk, but with a thrust-to-weight ratio of approximately 0.33, it was on par with that of a lightly loaded Boeing 727. About 7kg (15lb) of back stick at 160kt indicated was required to obtain the 8° take-off attitude. The aircraft lifted off at 175kt, 1,700m (5,500ft) and 27s after brake release. Landing gear, flaps and slats were retracted by 300kt, where the wing was swept aft to the 25° position for initial climb.

Control forces during the clean up were light and resultant stick forces easily trimmed out. Take-off checks having been completed, we turned to the north to rendezvous with our air-refuelling tanker.

Global reach

We climbed to 5,200m above mean sea level at 370kt as we headed to the air-refuelling track 185km (100nm) north of McConnell. The tanker's navigator and our OSO orchestrated a point parallel rendezvous procedure, both aircraft on reciprocal headings, offset one turn radius laterally.

At a predetermined point, the tanker initiated a 180° turn so as to roll out in front of us. Throughout the manoeuvre we monitored our distance from the tanker via an air-to-air TACAN beacon. Relative azimuth was called out by the OSO, who manually tracked the tanker's skin-paint return on the Westinghouse (now Northrop Grumman) APQ-164 multi-mode offensive radar.

The tanker rolled out 2.8km directly in front of us at 320kt. We used our extra speed to close the gap quickly and establish ourselves in the pre-contact position. Tindal deftly moved the bomber to the contact position, and stabilised it there. The boom operator then flew the boom into the open refuelling receptacle in the B-1's nose.

With contact established, I observed how Tindal easily maintained the refuelling position. After 5min of dry hookup (no fuel was transferred), he disconnected and slid back to the pre-contact position. I simulated the air refuelling task by aggressively maintaining a position a few feet aft of the contact position. Having refueled in the F-111 and Lockheed Martin F-16, I wasn't sure how difficult it would be, but it proved to be fairly easy. The B-1's air refuelling capability gives it the range needed to strike targets from the USA.

Having seen how the B-1 would reach distant targets, we next looked at how it would deliver weapons once it got there

Clear of the tanker, we descended to 300m above ground level and entered the Air National Guard's Smoky Hill bombing range. While we did not carry any actual ordnance, we would simulate a load of Mk82 bombs with BSU49 tails, which allow delivery in either low-drag or retarded high-drag mode. We selected the high-drag mode for our low-altitude delivery, allowing us to escape the bomb's fragmentation pattern while ensuring the fuze would have time to arm.

For the bomb run, I swept the wing to 67.5°, its aft-most setting. I accelerated the bomber to 540kt true airspeed and started a left-hand turn to the initial point (IP), the last waypoint before the target. While the speeds we were flying were similar to those flown in the F-111, the B-1's 2.5g load factor limit made low-altitude manoeuvring somewhat more serene, necessitating fairly large lead points for any turns.

Radar aiming

After visually overflying the IP, I manually followed the head-down steering cues on the VSD for the final target run. The B-1's lack of a visual weapons delivery capability forces it to rely on radar aiming, which could prove a hindrance in some tactical situations. The target, a small cluster of vehicles, appeared off the nose as time to bomb release counted down to zero.

"Bomb Away" flashed on the pilot's stores panel display as the target slid under the bomber's nose. While the cluster of vehicles was a suitable target for a single bomb, it highlighted one of the B-1's shortcomings. The minimum release interval between multiple bombs is 0.02s. At 540kt, the distance between individual bombs is therefore18.23ft. The footprint of a B-1 releasing 84 Mk82s is a single-file string of impacts over 0.5km long. While this is indeed a rain of destruction, it is not well suited for targets with lateral development. After one more simulated bomb run at Smoky Hill, we exited the range to make our low-level entry start time.

While headed west toward the low-level entry point, we altered our course to overfly the La Junta electronic warfare training site. For this cruise portion of the sortie the wing was set to 25°. At 5,500m above mean sea level and 420kt/Mach 0.7, the total fuel flow was only 7,400kg/h.

With the autopilot and autothrottle engaged, I familiarised myself with the two back-seat positions. The DSO's primary job is, simply, to keep the bomber from being shot down. To accomplish this, the B-1 has the AIL ALQ-161 defensive system, which includes electronic countermeasures, radar warning receiver and ALE-150 towed decoys.

The DSO's station has three CRTs: one multifunction display and two electronic display units (EDUs), which are the centre of the DSO's attention. The left EDU is a panoramic spectrum display, which shows the frequency and magnitude of any electronic energy hitting the bomber. The right EDU shows the tactical situation format (TSF), a large-scale radar homing and warning (RHAW) display which provides a god's-eye view of threat systems around the B-1. Distance to each threat is shown by concentric range circles, with the bomber at the centre.

During our pass over La Junta, two threat systems came up on the TSF, an SA-2 and an SA-8. Audible tones, similar to those of other RHAW systems, alerted the crew to radar tracking and missile launch events. While all four crew members could hear the tones, only the DSO could see the TSF and the overall threat picture. Lacking a TSF repeater, the pilots are forced to build a mental picture of the threat situation based solely on the DSO's verbiage. Additionally, the DSO is the only crew member who can dispense chaff or flares.

While good crew co-ordination can overcome these limitations, there may be some situations where an upfront TSF display and pilot-accessible chaff/flare dispenser switches would enhance survivability. While I was unable to evaluate the effectiveness of the ALQ-161 in jamming the simulated threats, historically this has been a major weakness of the B-1. To address these concerns, as well as the ALQ-161's large long- term support costs, a comprehensive Defensive System Upgrade Programme (DSUP) has been undertaken (see The long road, P66).

During the final portion of our attack run, I shifted my attention to the OSO station. At medium altitude, we would simulate the delivery of 28 Mk82s in low-drag configuration on an area target ideal for a string of unguided bombs - La Junta's airfield. On the dedicated display Dravis showed me the patch map made by the B-1's synthetic aperture radar (SAR). For final aiming we would use an offset aimpoint, as the SAR uses Doppler beam sharpening to build its picture.

Direct aiming is not an option, as to build a good SAR picture the aimpoint must be at least 10¼ off the nose. The picture of the airfield in both the 0.6nm and 2.5nm scales was fairly good. I was able to make out general features such as taxiways and runways, while the offset aimpoint, a 90¼ bend in a chain-link fence, showed up well. Overall picture quality was worse than in the Boeing F/A-18E/F Super Hornet, but on par with the F-16's; not surprising since the B-1's radar was developed from the F-16's APG-68.

JDAM and GPS

The Block D aircraft we were flying had a global positioning system (GPS) receiver, and was capable of delivering 24 2,000lb-class Joint Direct Attack Munitions (JDAMs) - essentially a low-drag Mk84 bomb with a GPS guidance package in its tail. JDAM gives the B-1 near-precision (approximately 13m), accuracy and autonomous all-weather attack capability. In addition to the obvious benefit of increased lethality due to increased accuracy, the weapon also improves the B-1's combat survivability.

Depending on drop altitude and airspeed, JDAM's range of up to 28km affords some stand-off capability, while the cross-track capability increases both the bomber's lethality and survivability. The weapon's ability to strike targets offset laterally from the flight path gives the B-1 the ability to hit multiple targets on single pass, not just those that fall in a single line. With simulated JDAMs, Dravis said, we could have hit about 15 different specific targets on one pass over La Junta's airfield. Fewer passes over the target mean reduced exposure to enemy threats and increased chances of returning safely to base.

While JDAM capability is GPS's most significant contribution to the B-1's combat effectiveness, it also has other beneficial effects. Acting in concert with the bomber's two INSs, the GPS yields a much more accurate position, a help in all navigation and radar targeting tasks. The accurate position and velocity information provided by GPS markedly improves the fidelity of the SAR-generated patch maps used by the OSO for weapons aiming.

Finally, GPS ties into the B-1's communication and navigation management system (CNMS). With its centre console-mounted control display unit, the CNMS gives the pilots a flight management system comparable to that found in current commercial transport aircraft.

Returning to the pilot's seat, we set the bomber up for low-level operations. Tindal selected the "Speed Lockup" feature of the engine control system, which increases the core (N) RPM idle setting to 90%, to improve throttle responsiveness in the low-altitude regime. The structural mode control system (SMCS) was also switched on. The two canard-like control vanes on the B-1's nose are not there to improve manoeuvrability - rather they act to damp out structural bending oscillations encountered during high-speed, low-level flight. In addition to smoothing out the ride, they extend the B-1's structural life.

At the low-level entry point, near Farmington, New Mexico, I swept the wing to 67.5° while accelerating to our target ground speed of 540kt in a hand-flown descent to 1,100m above ground level. Once level, I selected the 300m set clearance plane (SCP) and "Hard" ride on the terrain-following (TF) control panel. The SCPs available range is from "A" to "K", with corresponding altitudes between 60m and 600m.

Modes of aggression

The three available ride modes, "Soft", "Medium" and "Hard", determine how aggressively the bomber's flight path will follow actual terrain returns. Approximate manoeuvring longitudinal g limits for each are: soft 1g +/- 0.25, medium 1g +/-0.5 and hard 1g +/-0.7. With the autopilot coupled to allow automatic following of sequential waypoint steering, I engaged the TF system. Once engaged, it pitched the bomber down to 10° nose low. At approximately 300m above our desired SCP, it initiated a smooth round out to level off at 300m above ground level.

The B-1's TF function is a sub-mode of the offensive radar system, not a dedicated unit. The radar time-shares between TF, navigation and targeting functions, with TF having priority. Unlike the F-111's TF display, which uses a somewhat confusing "E scope" (a non-linear terrain presentation), the B-1's is linear from the nose of the aircraft out to 20km. I found the terrain -following display mode of the VSD logical and easy to interpret.

Over New Mexico's gently rolling terrain the TF did an admirable job of maintaining our desired SCP, smoothly anticipating rises and descents. A large open cross in the VSD showed commanded vertical and lateral guidance, not unlike that provided for a coupled instrument approach.

Unlike the F-111's TF system, which gives a constant stream of tones to indicate commanded climbs or descents, the B-1's only gives audible tones when the aircraft is off path and correcting to the commanded profile. While TF audio volume is adjustable in both, I preferred the B-1's as it did not needlessly clutter the audio channel under normal conditions.

For one relatively flat leg of the route, level at 2,150m MSL (300m AGL) and 540kt/Mach 0.85, total fuel flow was 14,000kg/h for the then 136t bomber. Preferring to hand-fly the last few legs of the low-level route, I disengaged the autopilot and enjoyed the view as we overflew Utah's beautiful Lake Powell. The final tactical event we accomplished was a low-altitude "Bug Out" manoeuvre.

After a 2g 180° turn in military power, to avoid a simulated radar-guided threat, our speed had bled off to 450kt. The threat now behind us, I selected maximum afterburner to leave the area quickly. The bomber reached 600kt/Mach 0.95 in less than 27s. Our low-altitude top speed was equal to the Super Hornet's - not bad for a bomber.

Homeward bound

The 1h return leg to McConnell gave ample time for discussion on what the B-1 needed to improve its combat effectiveness. During the flight, Tindal had made numerous references to the B-1's limited manoeuvrability. While it was manoeuvrable for a bomber, it would never survive an air-to-air encounter with a front-line fighter. The only way to employ the B-1 in a hostile environment is with stand-off weaponry.

The future lies in the Joint Air-to-Surface Standoff Missile (JASSM). Weighing slightly more than 900kg, it can deliver a 450kg warhead over 370km from its launch point. The B-1's trump card over the other US strategic bombers is its ability to carry 24 JASSMs, twice as many as the B-52 and 50% more than the B-2. In addition to the DSUP, future radar upgrades will give the B-1 ground moving-target indicator and air-to-air sub modes.

Our discussion drew to a close as we manoeuvred for our approach to McConnell. Pattern altitude was 1,000m MSL, about 600m AGL.

Once established on a downwind leg, I swept the wing to 15°, its most forward position. Slowing through 270kt, the slats were extended and flaps set to "Half." I turned the base leg and selected flaps "Full" at 220kt while slowing to 172kt, 20kt above our final approach speed. Once established on final, the gear was lowered and I slowed the bomber to 152kt/7¼ angle of attack (AoA). Using the VSD flight director and ILS to aid my approach I found the B-1 to be a stable instrument platform.

The engines were responsive and allowed me to control approach airspeed within a few knots. At 30m, Tindal took control for the touchdown and full-stop landing. As the aircraft entered ground effect, he pulled back on the stick to maintain 7° AoA throughout a moderately firm touchdown.

Once the nose wheel was on the runway he pulled full aft stick to use the large horizontal stabilators for aerobraking and extended the speed brakes. At the runway's 1,200m remaining marker board, Tindal firmly applied the wheel brakes, rapidly slowing the 100t aircraft to a safe taxi speed.

Lethal Lancer

Taxi back to the ramp and parking were uneventful. Engine shutdown and post-flight checks were straightforward and easily accomplished. During our 4h 49min sortie I saw a wide range of the B-1's capabilities. Despite teething pains and the demise of its original mission, the Lancer has matured into a capable conventional bomber. Its ability to deliver 84 Mk82s or 24 near-precision JDAMs in all weather conditions to distant targets makes it the USAir Force's heaviest hitter. The planned addition of JASSM to the B-1's repertoire will allow it to strike heavily defended targets with impunity, making it truly a lethal Lancer.

Source: Flight International